1. 安装node/npm/hexo
在 nodejs 官网下载 Ubuntu的压缩包,解压
1 | tar -zcvf node-v18.18.2-linux-x64.tar.xz |
设置全局变量,注意是把他从一个路径弄到另一个路径里,下面两个/usr前面都有空格
1 | sudo ln -sf /root/node-v18.18.2-linux-x64/bin/node /usr/bin/ |
安装Hexo
1 | npm install hexo-cli -g |
本地测试启动
1 | hexo init yourblogname |
下载一个主题 https://hexo.io/themes/
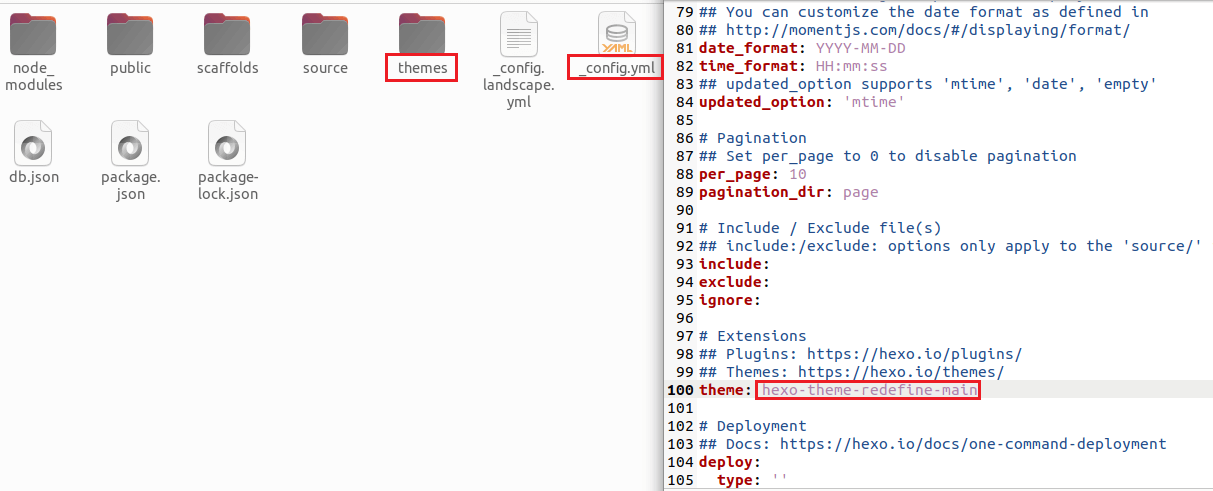
选择一个主题会自动进入github链接,把主题解压后放入到主题文件夹里,并且把_config.yml里的主题名称修改

重新生成测试
1 | hexo g |
2. 配置git
配置git ssh
1 | git config --global user.name "用户名" |
添加ssh到信任列表
1 | ssh -T git@github.com |
添加ssh到github,首先查看密钥,然后保存到github个人,setting,ssh里
1 | cat ~/.ssh/id_rsa.pub |
最后再配置一下仓库的地址

安装一个hexo-deployer-git部署插件
1 | npm install hexo-deployer-git --save |
最后上传到github即可
1 | hexo g |
3.配置域名
配置cName,www解析到自己的网站
配置A记录
1 | 185.199.108.153 |
配置AAAA记录
1 | 2606:50c0:8000::153 |

4. 新建文章
以下命令会在 source/_posts下新建一个md文件,在里面编写即可;也可以新建一个页面,重新生成上传即可
1 | hexo new 'MyArt' |